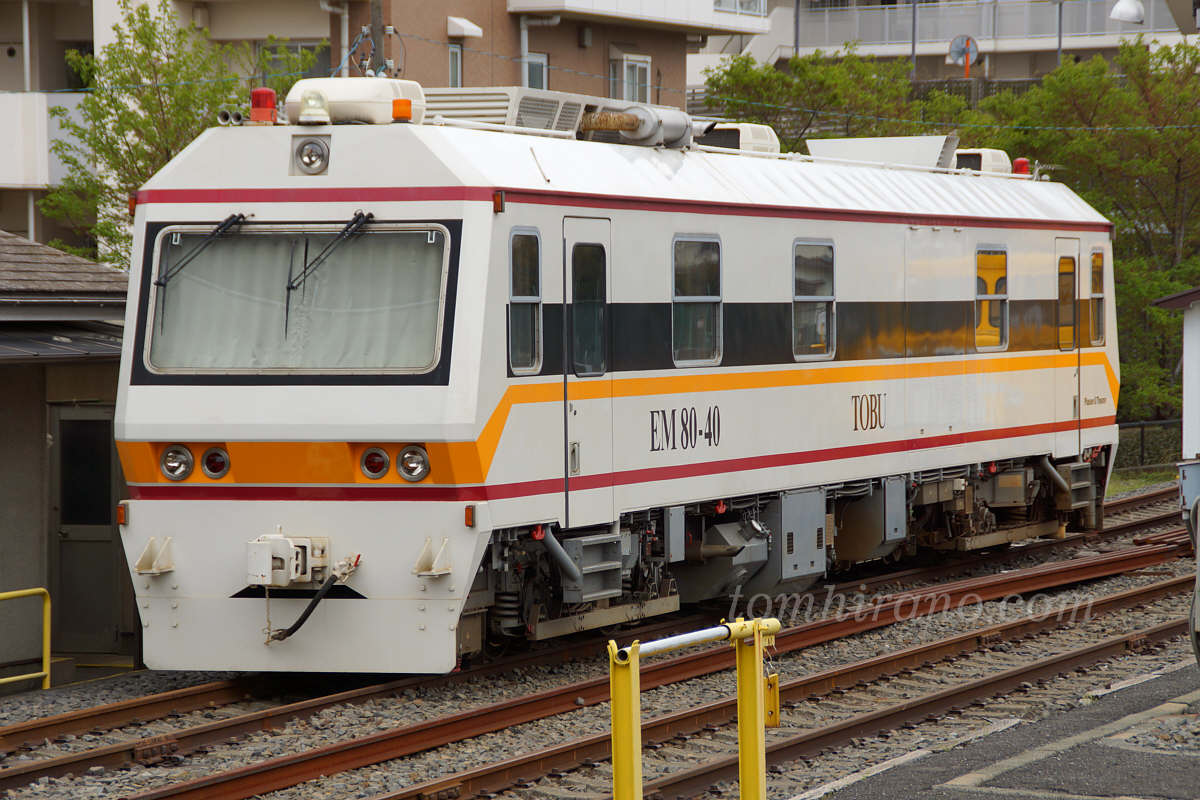
A track inspection vehicle EM80-40 that I sometimes saw along the Tobu Tojo Line.It was a vehicle wearing Spacia color, and it was parked on the side of the track during the day.This is a vehicle that I have wanted to build myself someday since I first saw it. Now that I can use a 3D printer, I tried making it as an N scale vehicle.
Information gathering
I couldn't find any materials for EM80-40 (sweat), so I ended up creating one based on my memories and photos.I made the invisible parts using photos posted on the internet as a reference.That's why I don't know how accurate it is (lol)
EM80-40 modeling
EM80-40 made in the past
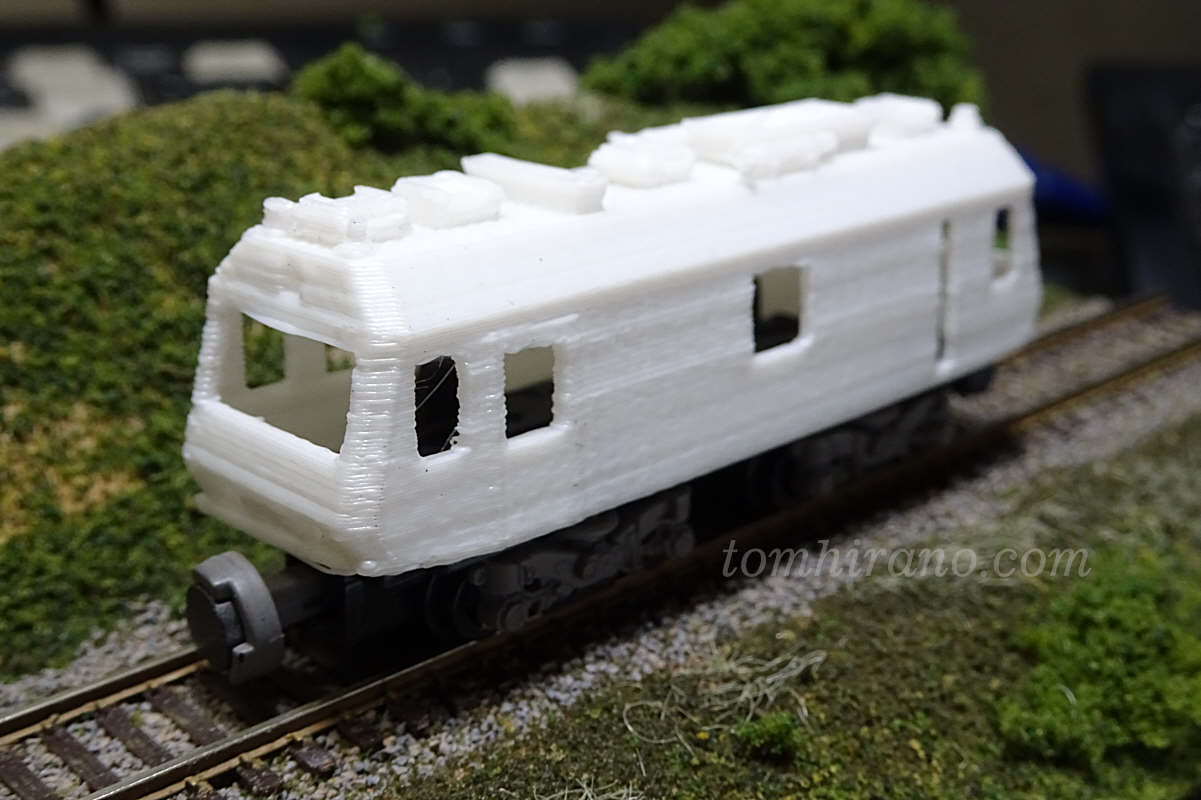
Actually, when I first bought an FDM 3D printer, I tried using the B Train Shorty size.I started with zero modeling knowledge.I remember that it took quite a while to make.Here is the output product at that time (lol) It is not in a usable condition (lol)
After this, I came up with a technique to prepare the surface by applying a top coat of light-curing resin, but although the flat surface was fine, I was unable to reproduce any of the details.In the end, it was shelved (lol)
EM80-40 again
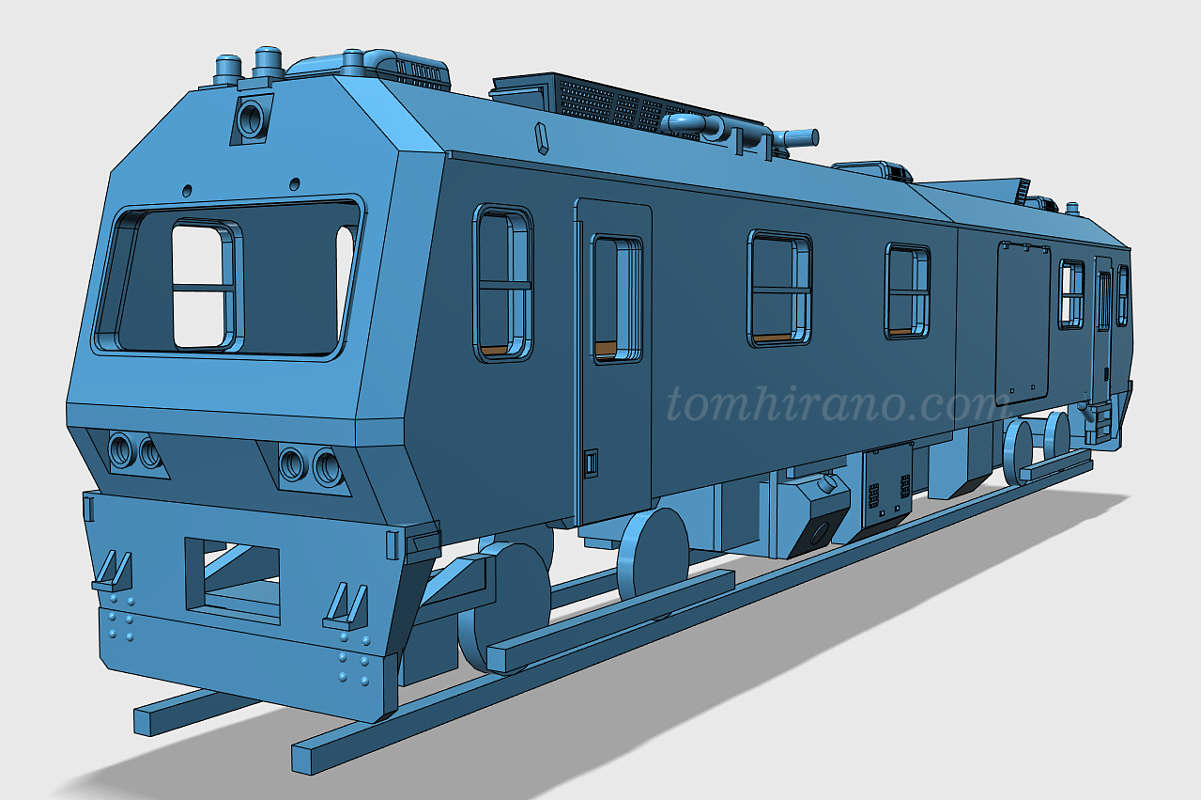
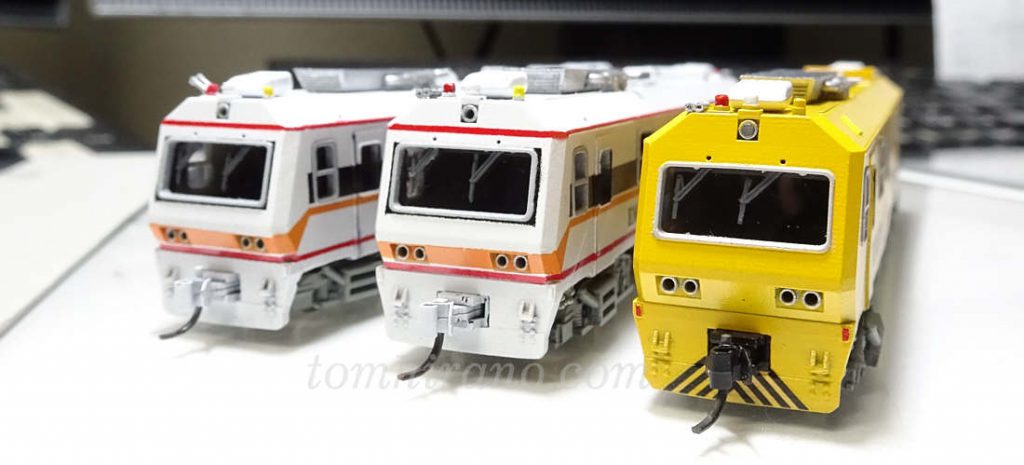
After about three years, I tried modeling again. It looks like the B Train Shorty series has come to an end, so this time I'll be modeling it in full size.Although I was troubled by the lack of materials, I was able to come up with something that I was satisfied with.Since it's a shape I've made in the past, the data creation went quickly and the body took less than a day.
Since I had some free time (?), I created the parts with separate data to make them easier to paint.Is there an air conditioner/exhaust unit on the roof?-The horn is made into a separate part, and the side window frame, which is difficult to paint, is made into a separate part.
Difficult suspension

The most difficult part of production was under the floor.Due to lack of documentation, I guessed the location of the equipment based on various photos.In addition, the inspection wheel could not be reproduced, so we had to disguise it with reliefs.
Since I was making it without even knowing the overall length, I made some adjustments to suit the power unit.This time I usedPower unit for railway collectionTM-06R (for 18m vehicles).
3D printer output
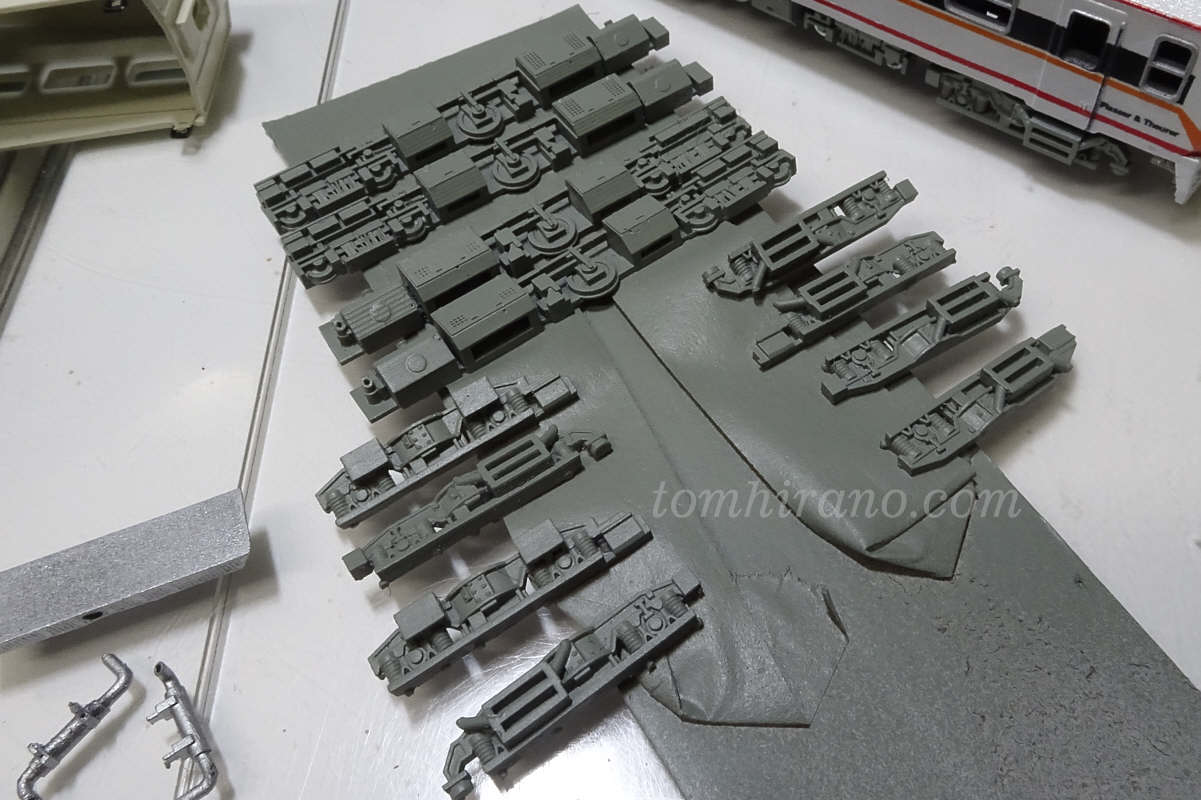
The output is my own Anycubic Photon.It has some quirks, but generally does a good job.In addition to the body, the output products included an air conditioner, an exhaust unit on the roof, a horn, and a window frame.Under the floor, there are 4 types of truck reliefs (all different lol) and 2 types of underfloor equipment on the left and right sides.There were surprisingly many.I was planning to do the front window frame and wiper, but after I started painting, I realized that they weren't there this time (lol)
Painting
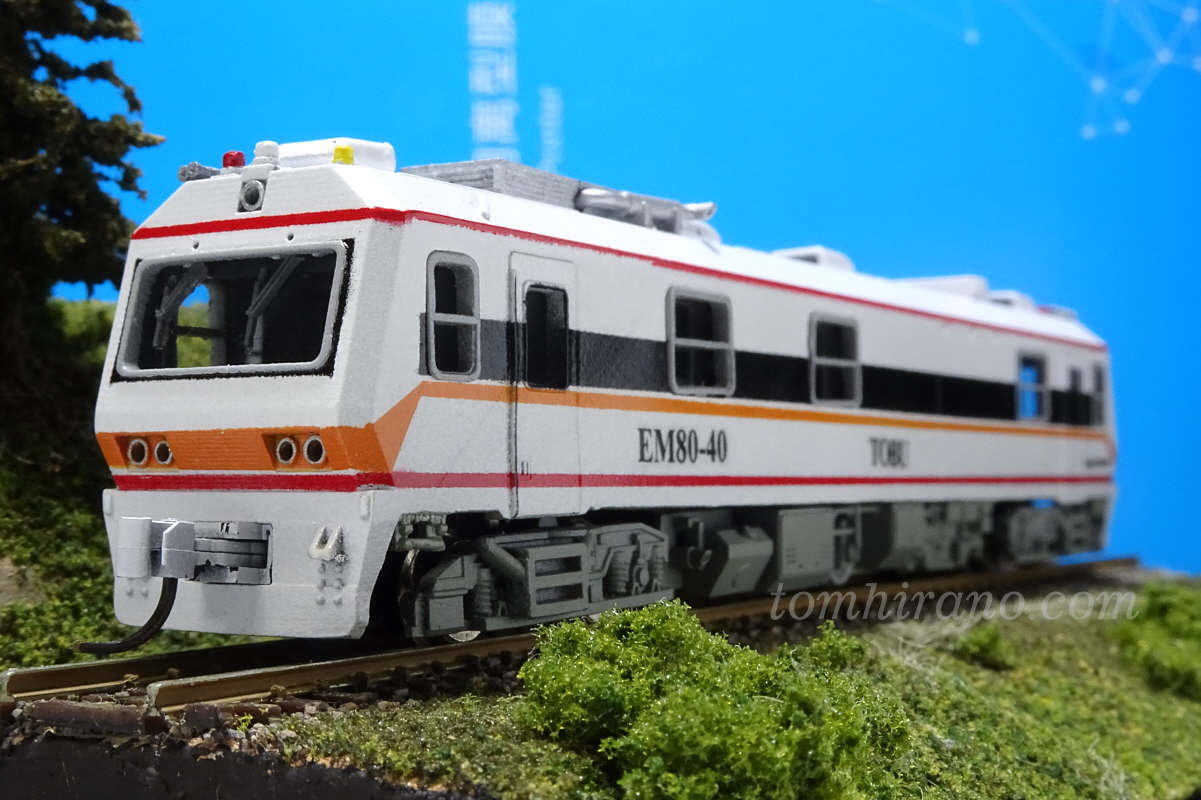
As always, I don't have the motivation to do so, so I'll keep the white as a surfacer (huh?) The gray window frame is also a surfacer (yikes), and the black belt on the side is also a surfacer lol. That's why it's a little thick (lol).Under the floor is Mr.Color Gunkan Color (1) No. 31, a leftover item that I bought a long time ago and was starting to rot.
The red band on the car body is Tamiya acrylic X-7.For the orange, mix red X-7 with a small amount of yellow X-3.It's impossible to reproduce because it's a visual measurement (lol) The letter decals are homemade as usual.Laser printer on transparent decal paper.I think the font was Times New Roman, and the letters in Plasser Toiler were square Gothic.
Complete
Like this.I can see that the painting was done poorly (lol) I would like to do it more seriously next time lol
There is only one EM80-40 in existence, so we cannot make many.I took advantage of the extra body and painted it in the style of vehicle manufacturer Plasser & Theurer.I think the logo was a little big (lol)
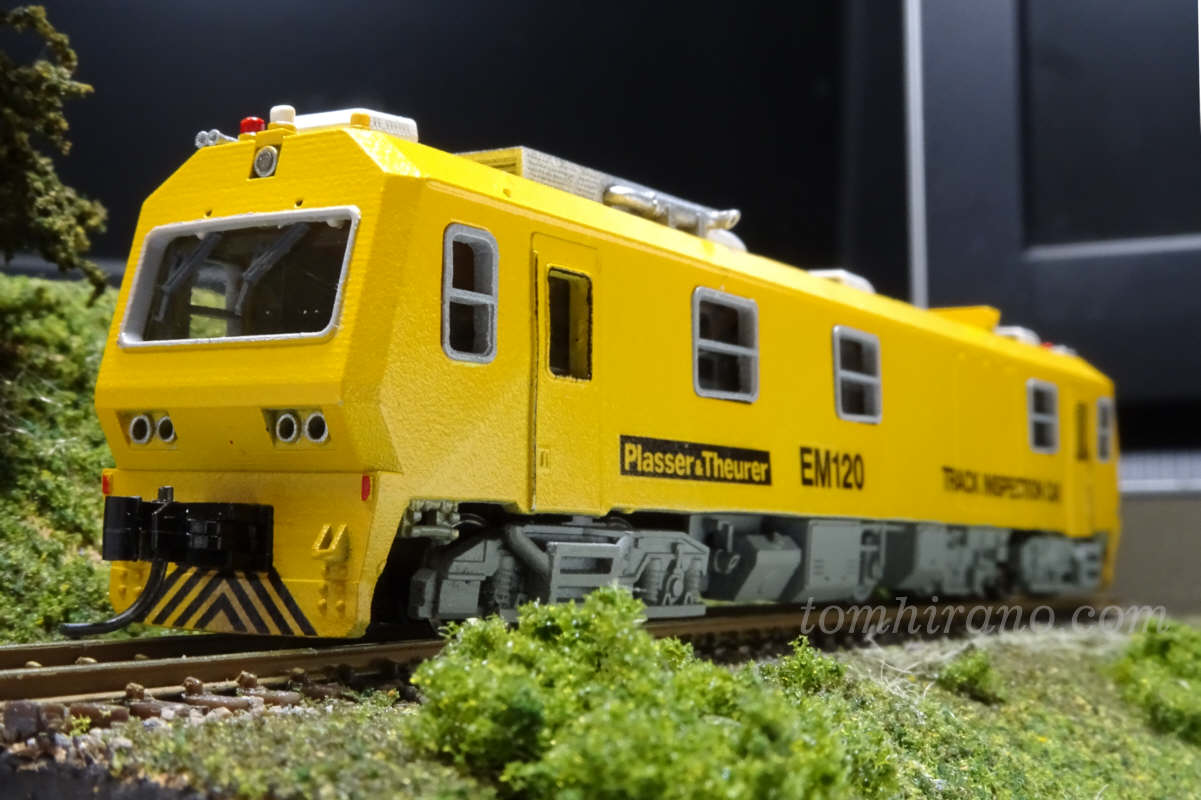
Well, I guess that's fine.If you look at it from a distance (lol)
Electrical system
I would like to simply install optical fiber around the light.I haven't received the essential materials yet, so I would like to incorporate them as soon as they arrive.The power is still the same as the railway collection, but I think it would be a good idea to install a DCC decoder if I had the money.Even so, the track inspection vehicle is of no use because it runs alone (LOL).
It's over lol